 Home
Home

In this guide we show you three different methods to move sprites in the Scratch stage. Maybe you are already familiar with some of them, but we are sure we can show you something new.
But what you don't know how to use Scratch at all...? Don't worry, we prepared with instructions on how to get started. Feel free to skip it if you have tried Scratch before; or click here to read it first.
The simplest method we present is gliding. In this section we will put together an interactive ball playing scene. Check it out here! Click the green flag, and then keep pressing Space (the long key at the bottom of your keyboard).
To read the Gliding section, click here.
The next method we will be controlling a sprite with your mouse. In this section we put together an interactive tag scene. Check it out here! Click the green flag, and then keep moving your mouse.
To read the section on controlling sprites with the mouse, click here.
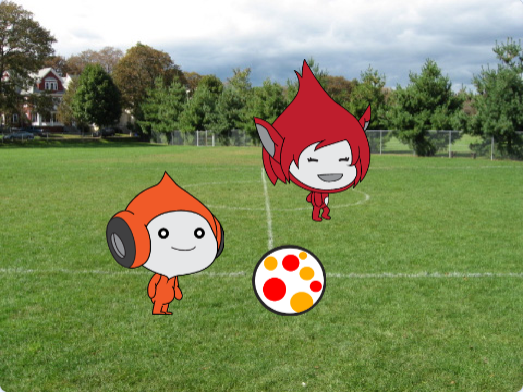
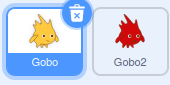
Finally we learn how to control a sprite with your keyboard. In this section we make a very simple project, just moving two sprites to different ways. Check it out here! Click the green flag, and then press W, A, S, and D to move the red Gobo, or the arrow keys to move the yellow Gobo.
To read the section on controlling sprites with the keyboard, click here.
First, let us get to the online Scratch 3 editor. If you’re already familiar with Scratch, feel free to skip this section.
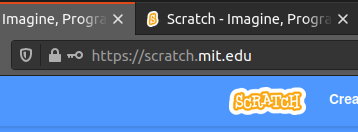
Go to the Scratch website in your favorite browser (Firefox, Chrome, Opera, Safari, Edge).
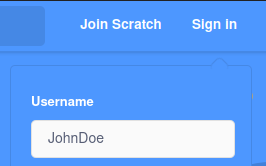
If you don’t have an account yet, create one clicking on “Join Scratch”; otherwise click on “Sign in” and enter your username and password.
Click on “Create” to start a new project.

The Scratch online editor appears. If you want to use it in your own language, click on the globe symbol at the top. Right to the globe, you can name your project:

To begin with you have one sprite, Scratchie cat. You can make cool projects using just her (him?), but if you prefer so, feel free to replace it by clicking on the trash bin icon at the corner of Scratchie’s thumbnail icon on the right, and choosing another sprite clicking on the New Sprite tool (blue cat icon on the bottom right).


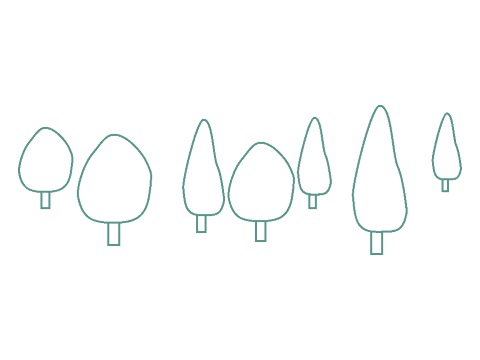
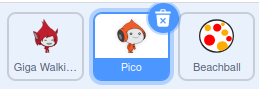
Add a few further sprites, so that you will have more options when moving. In the first project of this guide we will use two Scratch creatures and a ball, but feel free to add anything else. To switch between sprites, click on their thumbnail on the right. Make sure you always choose the sprite you want to move before creating the code. :)
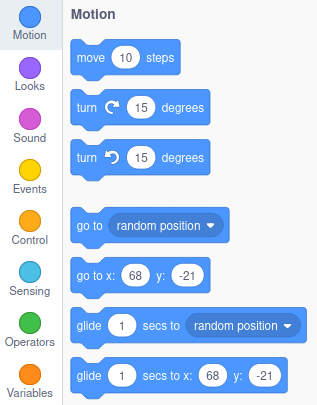
On the left, you will find the Scratch blocks, sorted by colors into several categories. These are the basic building blocks of every Scratch program. In other words, a Scratch program consists of colorful constructions made of these blocks. On the top, you find the blue Motion blocks. We will use these a lot in this guide.
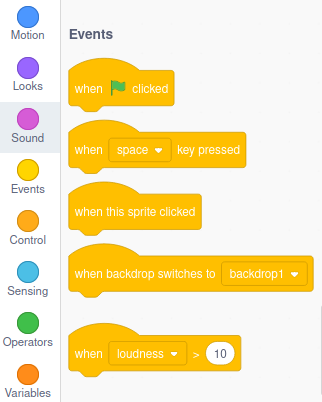
Scroll down a bit and you’ll find the light yellow Events blocks. We will need these, too, to get the motion started, since every Scratch code starts with them.
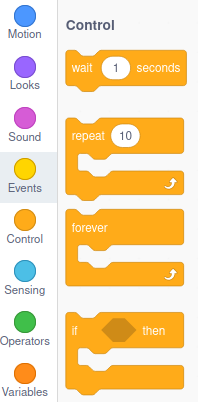
Finally, we will need the dark yellow Control blocks, too, to repeat or pause movements.
The simplest way to move a sprite is using the glide blocks. Using these blocks you only need to tell Scratch where you want your sprite move, and how fast; Scratch works out the details. In the Scratch project accompaníing this section we make two Scratch mascots play with a ball. Of course, you can use any other sprites of your choice.
Let’s start with a very simple movement. Choose a mascot clicking its thumbnail, and place a “glide 1 secs to random position” block to the large white script area, where the codes of the sprite will be constructed.

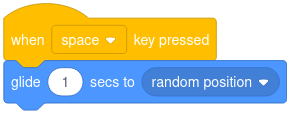
If you click the block, the sprite will move on the right; and if you click it once more, it will move again. Sometimes slower, sometimes faster, because it will take both long and short distances in one second. To make controlling the movement easier, you can add an event block to the code; for instance, “when space key pressed”. If you place the yellow block close enough to the blue one, they will join together. Now the sprite will move whenever you press space (the long key on your keyboard).
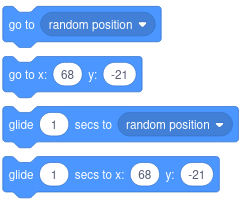
Now let’s make the other mascot move. There is another glide block with two numbers, x and y. These are coordinates. You may have learned of them in math classes. The scene where sprites move is a coordinate system, just like the one that you learned in school. But unlike in math classes, you don’t need to calculate these numbers, because Scratch generously does that for you. If you place your sprite somewhere in the scene, its x and y coordinates will appear in the blue blocks.
And if you place it somewhere else, the coordinates will change accordingly:

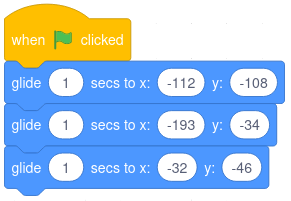
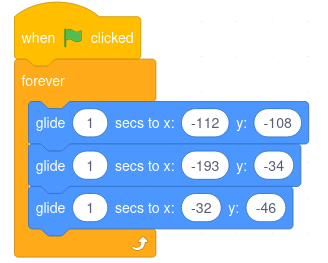
Pick the “glide 1 secs x: … y: …” block, and put it in the white script area, and add an event to it; for example, the “when green flag clicked” block. Now place the mascot somewhere else, and click the green flag above the scene. The mascot will move back. Now do this again; wherever you place it, it will glide back.

Replace the mascot and pick a glide block a few times. Now the mascot will make three glides at once.
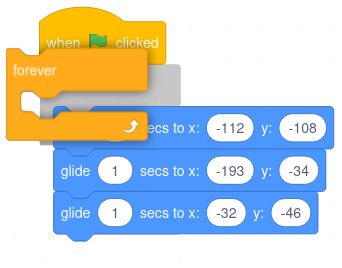
Now let’s make the mascot dance, repeating the glides. For this, we will need the dark yellow “forever” block. It is C-shaped, and it will surround the three blue blocks if you place it close enough to the top one. If you click the green flag, the mascot will keep moving until you click the red stop symbol near it.
To complete this piece of code, let’s add a second of delay after each glide block to make the dance slower.
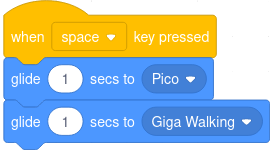
Finally, let’s make the ball move back and forth the two mascots. The first mascot starts moving when we press space, so it’s a good idea that the ball starts with it. It glides to the other mascot, wherever it is, instead of to a random position or some specific x and y coordinates. You can uncover this option clicking the little white downward arrowhead near the “random position”. Use this to make the ball glide to the other mascot and back.
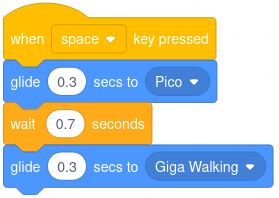
The ball is not fast enough; sometimes by the time it reaches the other mascot, it has already moved away. Let’s make it faster. What’s faster than one second? Half a second, or even less, maybe fourth or fifth of a second. You can replace “1” by a decimal fraction, say, “0.5” or “0.2”. Note Scratch uses the English notation for numbers even if it is set to another language, so there is a dot after the zero (and not the comma that is used in several countries). Use a dark yellow wait block between the blue glide blocks, just as you did before.
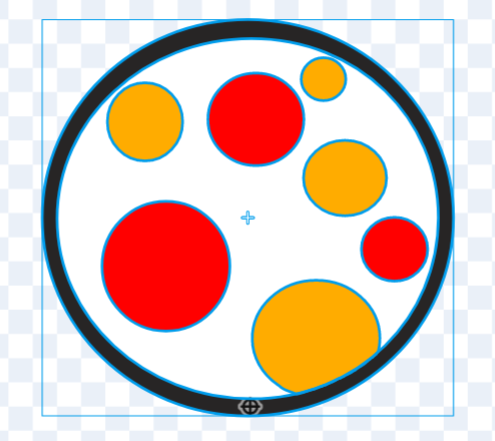
Now the timing of the ball is corrected, but it may still not arrive exactly to the other sprites, especially if you drew it yourself. This is because the centers of the sprites it may not match exactly. To fix this , click the Costumes tab of each of them, select them with the arrow shaped Select tool, and move them. The center will be shown with a crosshair. For example, you can set the bottom of the ball and the feet of the mascots as their centers. Now the ball game will be flawless! :)

Add a nice backdrop, and your project is ready.
The glide blocks are great if your sprite moves along a straight line; but many times you will want your sprite make twists and turns. In this section we develop game scene with curved motion. You can find the accompanying Scratch project here.
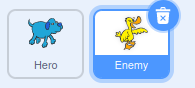
Start a new project and choose two sprites, one for the Hero, and one for the Enemy.
Let’s start with the Hero’s code. (Make sure you select it by clicking on its thumbnail before adding code. We would like it to move and turn at the same time, so let’s start with the top two of the blue Motion blocks.
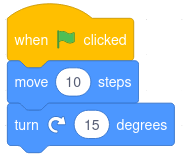
As expected, the sprite moves a little bit, and turns a little bit.
Now let’s make the motion continuous with a “forever” block,, just as we did in the previous project.
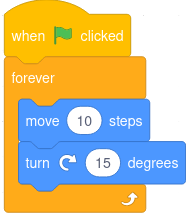
Now the sprite keeps moving forward and turning, eventually making circles in the scene.
This is nice, although a bit boring. How about the user telling the sprite where to go? For this you’ll need to search bit further down in the list of Motion blocks, and replace the “turn” block with “point towards mouse pointer.
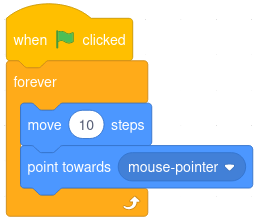
Now the sprite follows the mouse pointer, wherever you move it.
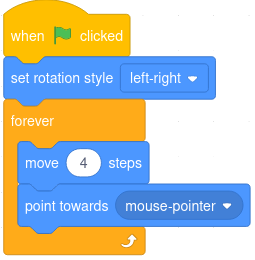
Is the sprite moving too fast? Slow it down by decreasing the number of steps at each move. Do you find it silly that it keeps turning upside down? Use another Motion block to prevent this.
Now let’s turn to the code of the Enemy sprite. This one will do the same as the Hero, except instead of following, the mouse pointer, it will follow the Hero. You still need the “point towards” block, but switch from “mouse pointer” to “Hero” by clicking the downward arrow:

The rest of the code will be the same, except that the enemy should be a bit slower:

And tadaa, we have a nice tag game scene! :) We will see in other guides how to develop it further into a complete game.
Finally, let’s see a simple project where we control the movement of a sprite with the keyboard, like in many games. There are various ways to do this, and we present here two of them. You can find this section’s Scratch project here.
Create a new project with two sprites. They will be moved using different methods.
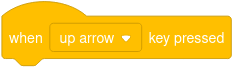
Let’s start with the simpler one. As we saw before, every piece Scratch code starts with a yellow event block. One of these event blocks is the event of a key press. Place this in the white script area, and set it from “space” to “right arrow” clicking the white downward arrow.
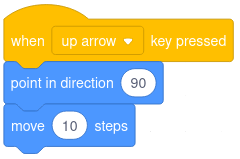
We want the sprite to move upwards at this event. Let’s do it the style we moved our sprites in the previous section, making it point in the specified direction and moving a bit. For this we need the familiar “move” block, and a version of the “point towards” block that specifies an angle instead of an object.
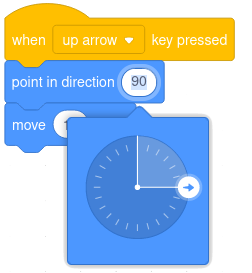
Is 90 degrees upwards? In geometry classes it is; but how do we know if Scratch uses the same standards for directions? Well, it doesn’t. You can check it clicking the number 90, by the protractor that pops up.
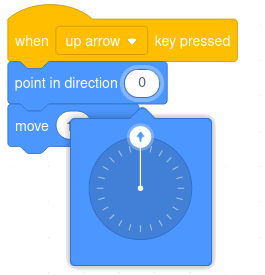
Turn the hand of the protractor so that it points up.
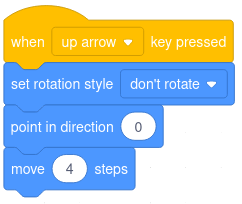
If you prefer, you can reduce the number of steps and set the rotation style of the sprite, just as in the previous session.
Now right click the yellow event block, and choose “duplicate” to create a piece of code for each direction.
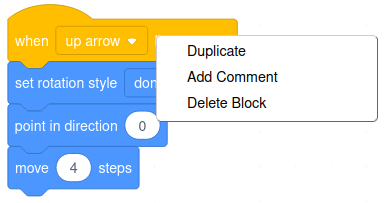
Code duplication is useful, but use it sparingly. It is hard to correct a dozen pieces of code after you copied them along with a hidden bug…
Finally, modify the key in the event block and the direction in the “point towards” block so that every direction is covered.
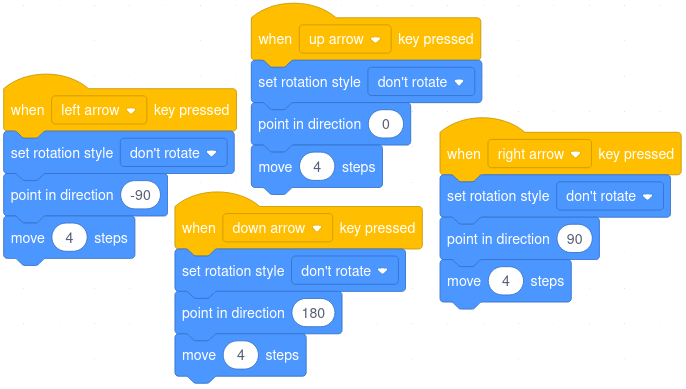
Now you can move the sprite in all four direction using the arrow keys.
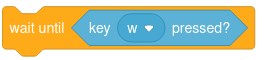
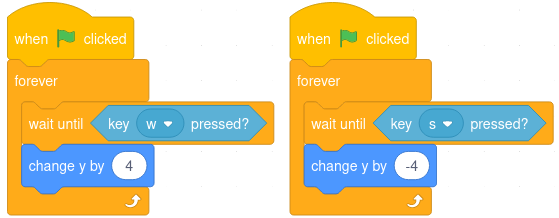
Let’s see the more advanced keyboard control method, switching to the the other sprite. There is another block detecting keys being pressed, in the light blue Sensing category. Pick it, and set the key to “W”.

This is not an event, but a condition that can be inserted into other blocks.
For example, you can place it into the “wait until” block (make sure you don’t mistake it for the similar “wait 1 seconds” block), so that the code execution will wait until “W” is pressed:
Now we can add movement blocks. For a change, let us think in terms of coordinates. As you can remember from math classes, the y coordinate corresponds to the vertical, up-down axis. Thus, changing this coordinate with a positive number will move the sprite upward.
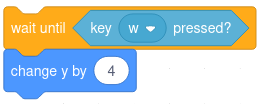
These steps of waiting and moving will be repeated from the clock of the green flag forever.

If upwards means positive change of y, downward will mean negative change of it. Just as before, duplicate the code and change the key and the number.
Similarly, right and left will mean positive and negative changes of x. You can duplicate again, but make sure you replace the “change y” block with “change x”.
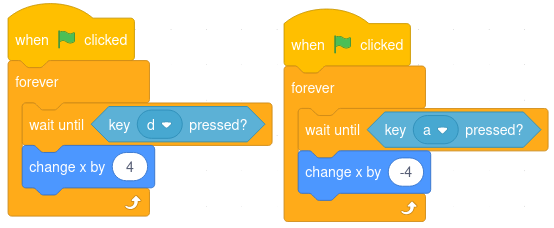
Now you can move the second sprite in all four directions, as well.
There are a few major differences between the first method with the event block, and the second one with the sensing block:
If you use the event block, the sprite will move even when the green flag is not pressed, so it starts a part of the project just as the green flag does. The sensing blocks don’t have this power.
The event blocks only let you move in the four main directions. The sensing blocks work simultaneously, letting you move right and up at the same time, that is, diagonally.
The event block works unconditionally. The sensing block can be used under any event; eg. you can start sensing after receiving a specific message, only letting the user move the sprite after the message arrived. This is very useful in games.
If you use the event block, there will be a short delay between the first step and and all further steps. Using the sensing block the movement will be smooth.
Too sum up: using the event block is slightly more complicated, but in general preferable.